
If you’re searching for a delightfully spooky yet irresistibly sweet treat, this Ghost Cake Pops Recipe is exactly what you need. Imagine bite-sized cake balls, coated in smooth white chocolate, draped with a ghostly fondant sheet, and finished with cute, expressive faces drawn with edible ink. These pops are not only adorable to look at but surprisingly simple to make, bringing a fun and festive touch to any occasion, especially around Halloween. Whether you're making them with the kids or treating your guests, these ghost cake pops make dessert both playful and delicious.
Ingredients You'll Need
Gathering simple, everyday ingredients is the first joyful step toward creating the perfect Ghost Cake Pops Recipe. Each component plays a vital role, from the richness of the butter enhancing flavor to the cake flours giving just the right crumb texture. Let’s see what you’ll need to bring these spooky bites to life:
- Unsalted butter (¼ cup + 2 tablespoons): Adds creaminess and moisture essential for tender cake crumbs.
- Vegetable oil (2 tablespoons): Helps keep the cake moist and tender, balancing the butter’s richness.
- Sugar (¾ cup + 2 tablespoons): Sweetens and helps create that lovely soft texture in the cake.
- Eggs (1 whole + 1 egg white): Act as the binder, giving structure to the cake pops.
- Vanilla extract (½ tablespoon): Enhances the overall warm flavor profile.
- Cake flour (½ cup + 2 tablespoons): Ensures a tender crumb that’s perfect for rolling into balls.
- All-purpose flour (½ cup + 2 tablespoons): Adds the right amount of structure to hold it all together.
- Salt (¼ teaspoon): Balances the sweetness and sharpens flavors.
- Baking powder (1 teaspoon): Gives a slight rise, keeping the cake light and fluffy.
- Buttermilk (½ cup + 2 tablespoons): Adds tanginess and moisture, enhancing softness.
- Frosting (about 3 tablespoons): Binds the cake crumbs, making it easy to shape the pops.
- Sprinkles (½ cup, divided): For added color and fun texture on your finished pops.
- White melting chocolate: Creates the smooth, ghostly coating around the cake balls.
- Edible pen: Lets you add personality to your ghosts with eyes and mouths.
- Fondant: Used to wrap the cake balls, giving them that classic ghost shape.
- Circle cookie cutter (3 ½ inch): Perfect for cutting uniform fondant ghost faces.
- Lollipop sticks: Essential for turning the cake balls into festive pops.
- Styrofoam block: A clever way to let your pops dry without a mess.
How to Make Ghost Cake Pops Recipe
Step 1: Bake the Cake Base
Start by preheating your oven to 350 degrees and prepping an 8x8-inch pan with parchment and non-stick spray. With a stand mixer and paddle attachment, cream together butter, sugar, and oil just until they blend—about a minute on low speed. Add the eggs and vanilla extract, mixing again gently to combine. Sift your flours with salt and baking powder before adding them to the wet ingredients, mixing on low just until incorporated. Finally, pour in the buttermilk slowly, making sure everything becomes one smooth batter. Pour this into your pan and bake for 20 to 25 minutes, then let the cake cool completely on a rack—this is the foundation for your ghostly treats.
Step 2: Prepare the Cake Pop Mixture
Once the cake is cool, crumble it finely using your hands or forks, aiming for a smooth, crumbly texture. Mix in the frosting, folding it in gently until the cake crumbs are just moist enough to hold their shape when rolled. This step is key—too dry and the pops fall apart; too wet and they won’t firm up properly. Use a small ice cream scoop to portion the mixture evenly, then roll into balls with your hands. Place the balls on a plate, cover with plastic wrap, and chill in the fridge for at least four hours to help them set.
Step 3: Dip and Decorate
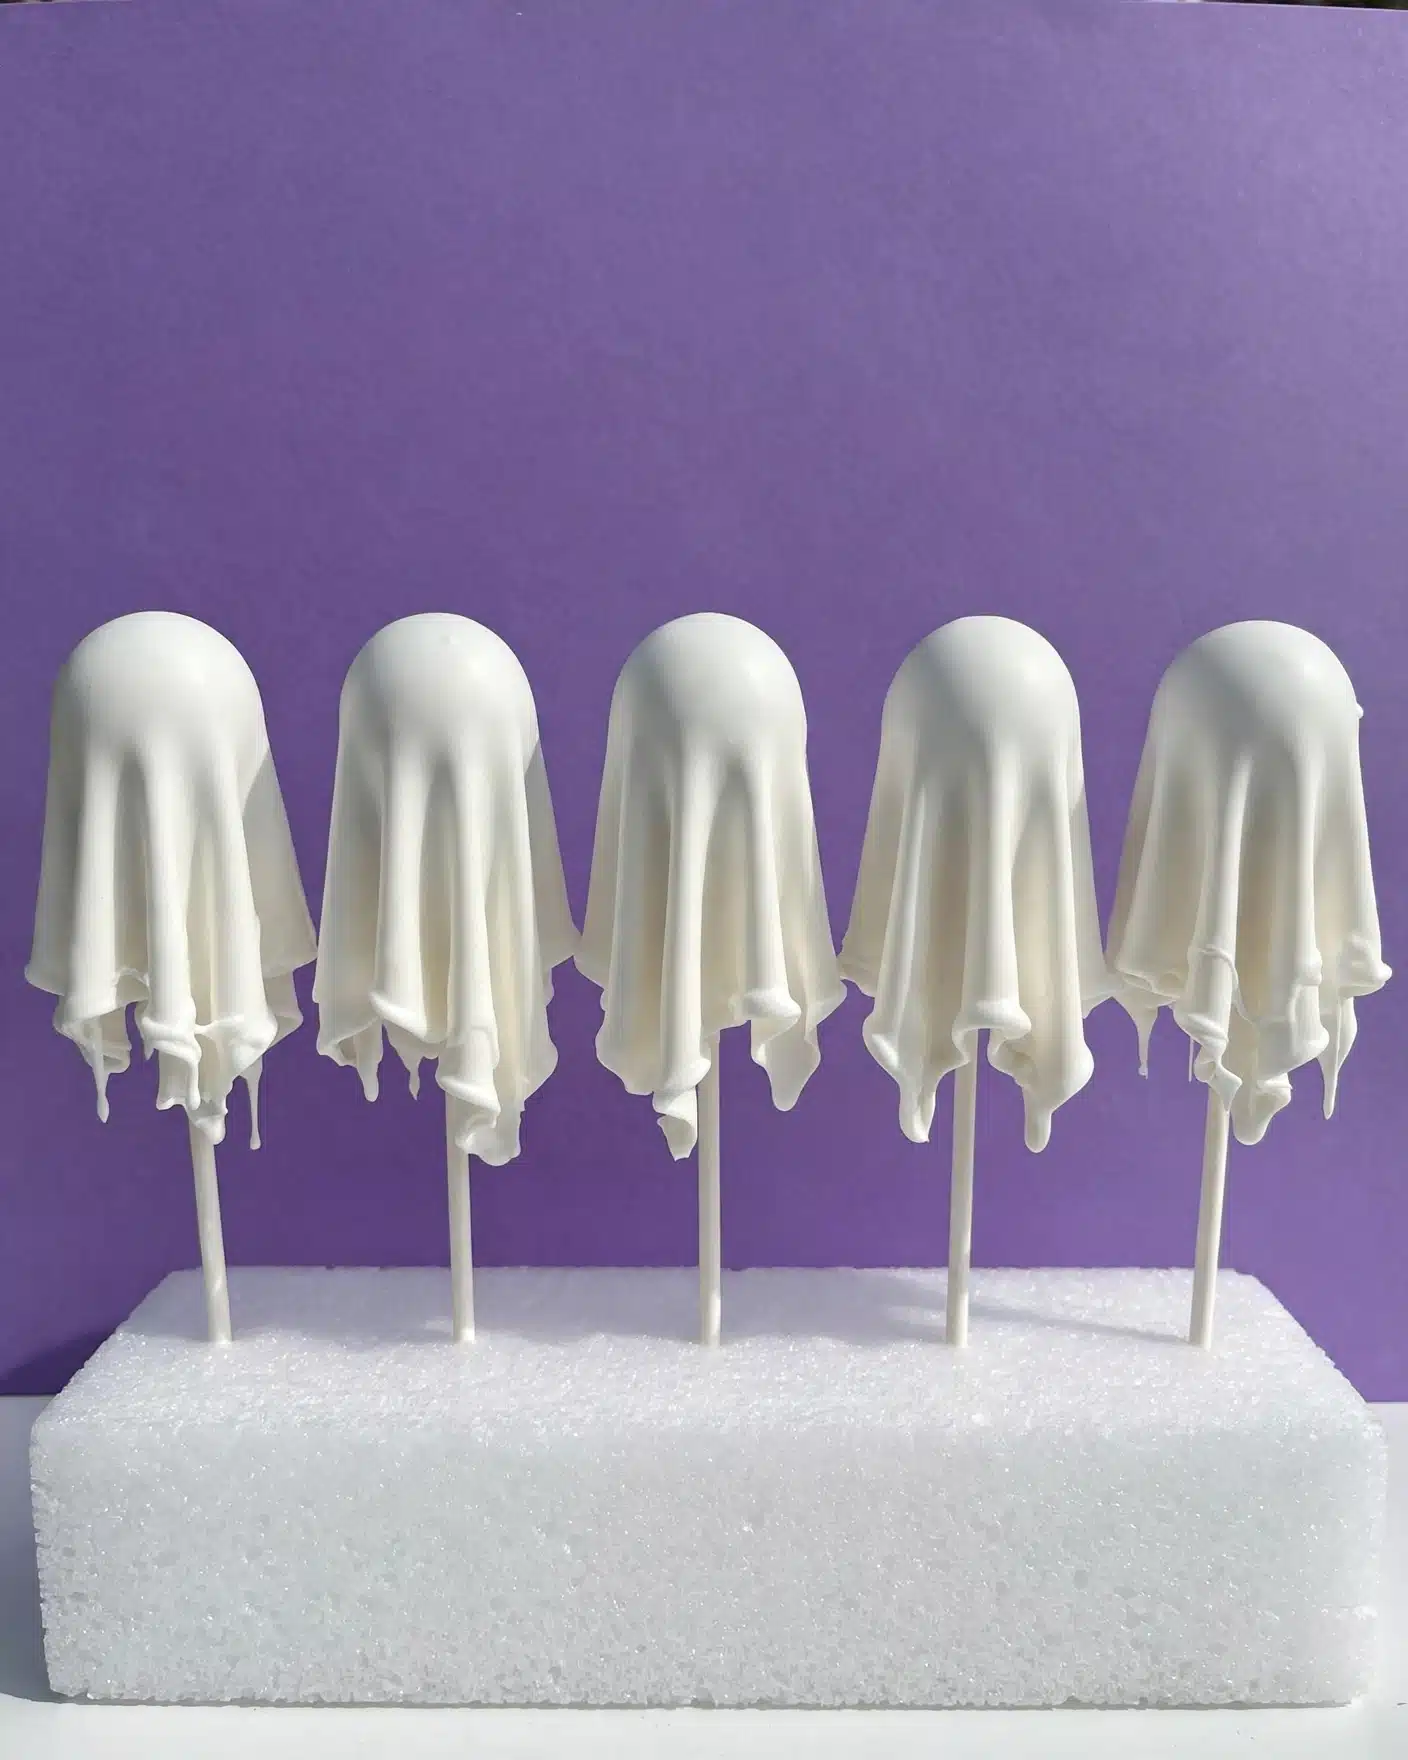
Melt your white coating chocolate in a deep bowl suitable for dipping. Dip the tip of each lollipop stick into the melted chocolate and then insert it halfway into a cake ball—this helps secure the stick. After a brief sit to set, fully dip each cake ball into the chocolate, carefully twirling and tapping off excess for a smooth finish. Stick each pop into the styrofoam block to dry completely. For the final eerie effect, roll out your fondant and use the cookie cutter to create circles. Place one fondant circle over each dried cake pop, pulling the sides down to form a ghost shape. Use an edible pen to add expressive eyes and a spooky or silly mouth, bringing each ghost to life.
How to Serve Ghost Cake Pops Recipe
Garnishes
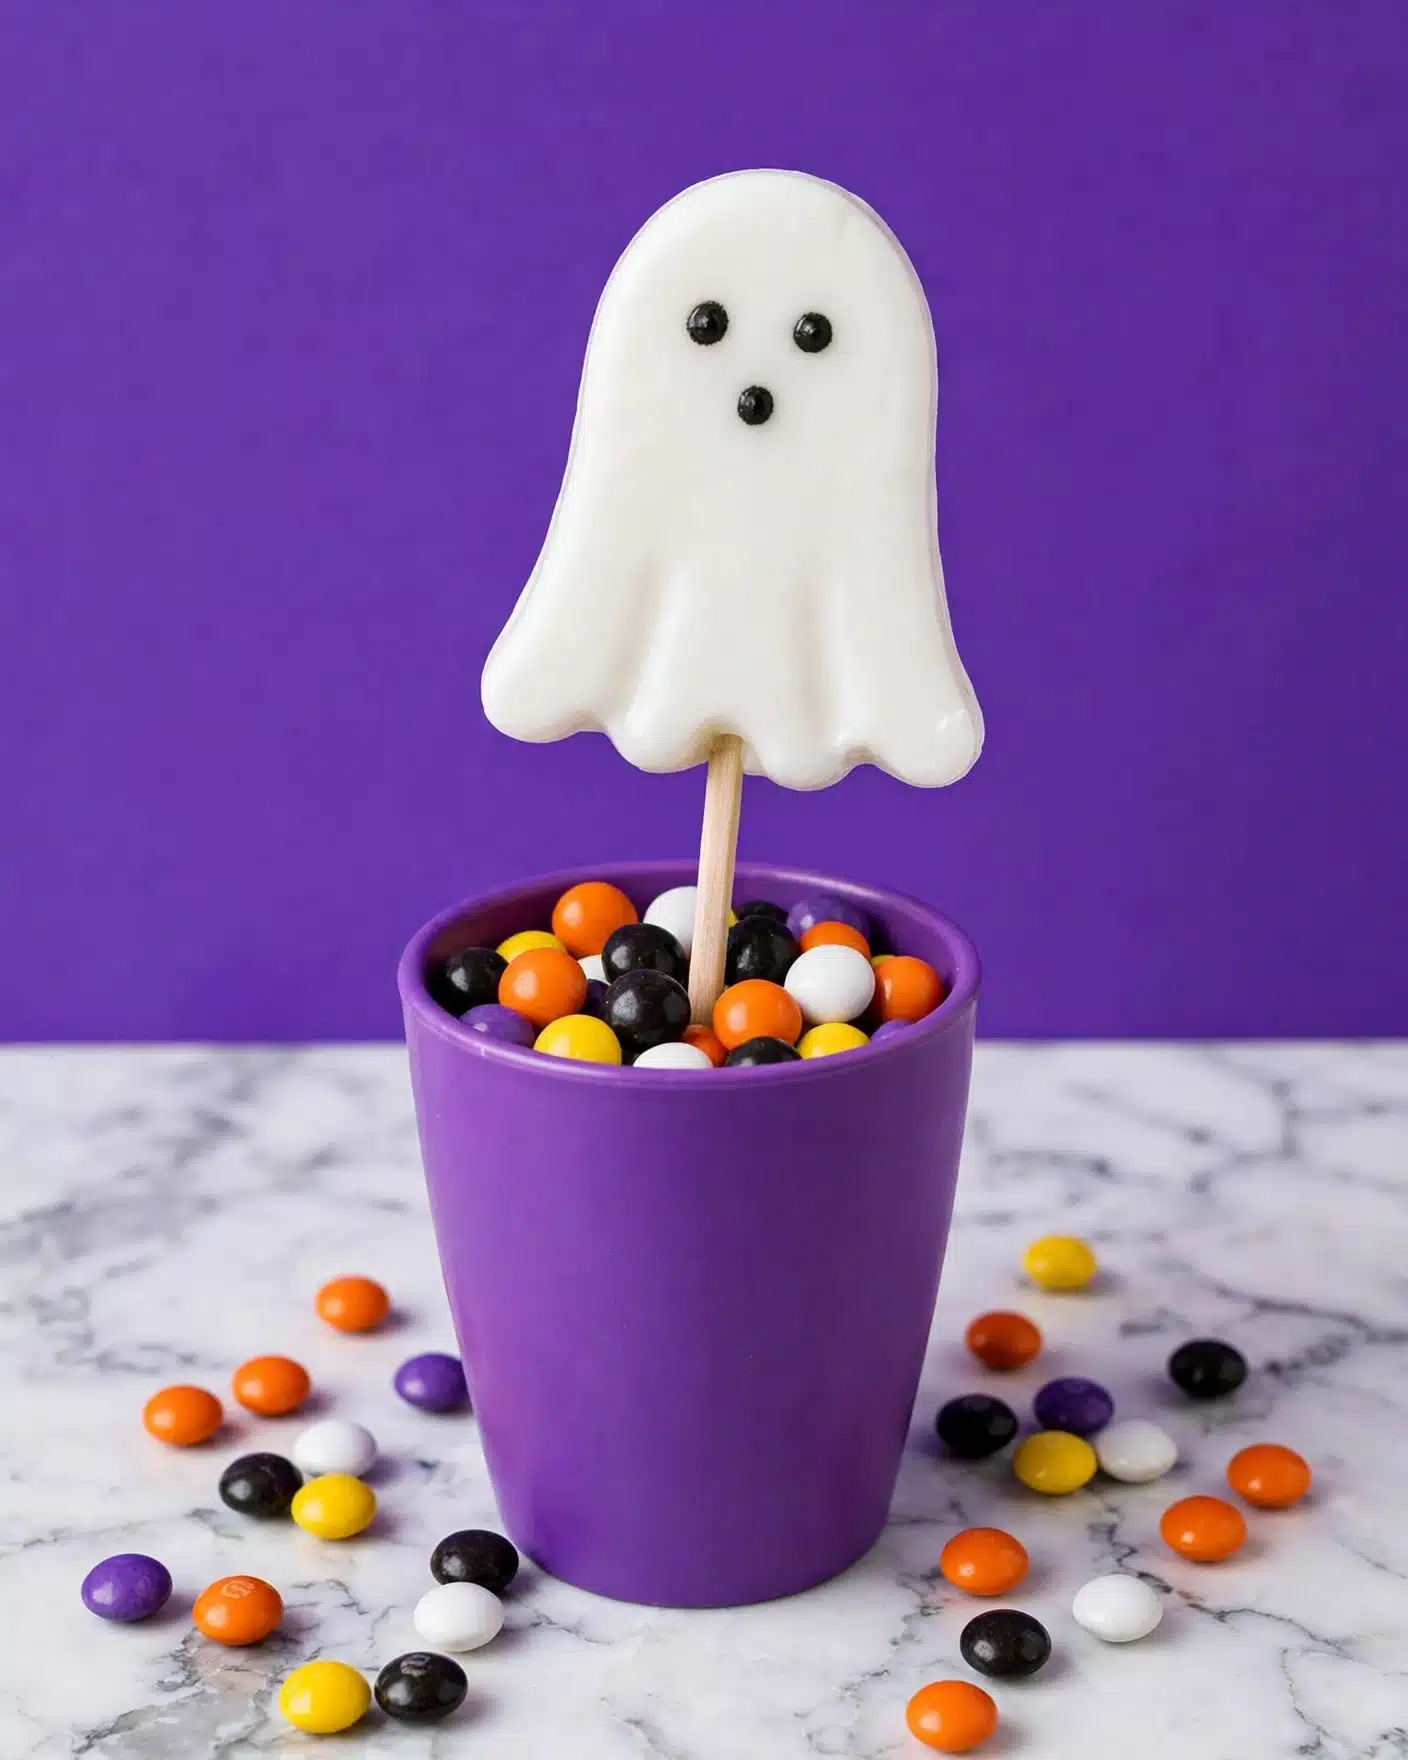
Adding garnishes is where your creativity really shines in the Ghost Cake Pops Recipe. Consider sprinkling edible glitter over the fondant to give your ghosts a magical sparkle, or press on a handful of colorful sprinkles around the base of the pops for a festive, playful touch. Even a tiny dollop of contrasting color frosting at the base can create a whimsical look reminiscent of floating spirits.
Side Dishes
The charm of these ghost cake pops is their versatility on any dessert table. Pair them with fresh fruit slices to balance sweetness or serve alongside a simple vanilla or pumpkin-flavored pudding to keep the theme cozy. A bowl of mixed nuts or popcorn can add a crunchy contrast to the soft cake pops, making the spread even more inviting.
Creative Ways to Present
Presentation makes all the difference, especially for something as fun as Ghost Cake Pops Recipe. Arrange your pops standing tall in a decorated styrofoam block wrapped with spooky-themed fabric or paper. Alternatively, display them in a clear glass vase filled with candy corn or black and orange candies for a Halloween vibe. You can also package each pop individually in clear plastic treat bags tied with festive ribbons—perfect for parties or little ghostly gifts.
Make Ahead and Storage
Storing Leftovers
If you have any Ghost Cake Pops Recipe leftover, store them in an airtight container in the refrigerator. This keeps them fresh and prevents the chocolate coating from melting or becoming sticky. They should stay delicious for up to four days, giving you time to enjoy this ghostly delight no matter your schedule.
Freezing
To enjoy these pops even later, they freeze quite well. Arrange them in a single layer on a baking sheet and freeze until firm, then transfer them to a freezer-safe container with parchment between layers to prevent sticking. When frozen, Ghost Cake Pops Recipe maintain their flavor and texture for up to two months—perfect for prepping ahead of time for a party.
Reheating
When ready to eat frozen pops, simply thaw them overnight in the refrigerator. Avoid microwaving or direct heat as it may melt the chocolate and ruin the fondant shape. Once thawed, your Ghost Cake Pops Recipe will taste just as fresh and spooky as when first made.
FAQs
Can I use store-bought cake instead of baking my own?
Absolutely! Using pre-made cake crumbs can save time and still produce excellent cake pops. Just be sure to choose a moist cake and crumble it finely for best results when mixing with the frosting.
What type of frosting works best?
A simple buttercream or even cream cheese frosting works beautifully because of their creamy texture, which binds the crumbs together without being too runny or stiff.
How do I prevent the cake pops from falling off the sticks?
Dipping the stick in melted chocolate before inserting it into the cake ball acts like glue and secures the pop. Give it a couple of minutes to set in the fridge before dipping the entire ball to ensure they stay put.
Can I use candy melts instead of white chocolate?
You can! Candy melts are more forgiving when melting and easier to work with because they don’t seize as easily as real chocolate. They come in a variety of colors too, if you want to get creative with your ghosts.
How do I store these at room temperature?
Ideally, Ghost Cake Pops Recipe are best kept refrigerated due to the butter in the cake and frosting. However, for a few hours at room temperature, place them in a cool, dry area away from direct sunlight or heat to keep the coating intact.
Final Thoughts
There is something truly magical about making and sharing this Ghost Cake Pops Recipe. It’s that perfect mix of creativity, fun, and deliciousness that lights up any celebration or cozy get-together. Give yourself the joy of crafting these charming little ghosts and watch how they bring smiles to everyone’s faces. So get your ingredients ready, dive into the process, and enjoy the sweet, spooktacular results!
Print
Ghost Cake Pops Recipe
- Total Time: 5 hours 10 minutes
- Yield: 16 cake pops
Description
Delightfully spooky and delicious, these Ghost Cake Pops combine a moist homemade cake with creamy frosting, coated in white melting chocolate and decorated with fondant for a fun ghostly finish. Perfect for Halloween or themed parties, these treats are easy to make and sure to impress with their adorable and haunting appearance.
Ingredients
For the Cake
- ¼ cup + 2 tablespoons unsalted butter, room temperature
- 2 tablespoons vegetable oil
- ¾ cup + 2 tablespoons sugar
- 1 egg + 1 egg white
- ½ tablespoon vanilla extract
- ½ cup + 2 tablespoons cake flour
- ½ cup + 2 tablespoons all-purpose flour
- ¼ teaspoon salt
- 1 teaspoon baking powder
- ½ cup buttermilk
For the Pops
- About 3 tablespoons frosting (buttercream recommended)
- ½ cup sprinkles, divided
- White melting chocolate (quantity sufficient to coat pops)
- Edible pen (black or food coloring marker)
- Fondant
- 3 ½ inch circle cookie cutter
- Lollipop sticks
- Styrofoam block (for drying pops)
Instructions
- Preheat and prepare pan: Preheat your oven to 350°F (175°C). Line an 8x8 inch baking pan with parchment paper and spray it with non-stick spray to ensure easy removal of the cake.
- Mix butter, sugar, and oil: In a stand mixer fitted with a paddle attachment, combine the room temperature unsalted butter, sugar, and vegetable oil on low speed until just combined, about 1 minute. This ensures even incorporation without overmixing.
- Add eggs and vanilla: Crack in the egg and egg white, then pour in the vanilla extract. Mix on medium-low speed until fully combined and smooth.
- Incorporate dry ingredients: Add the cake flour, all-purpose flour, salt, and baking powder to the mixture. Mix on low speed just until all the dry ingredients are moistened and combined to avoid developing gluten.
- Stream in buttermilk: Slowly pour in the buttermilk while mixing to create a smooth, well-blended batter without lumps.
- Bake the cake: Pour the batter evenly into the prepared baking pan. Bake it in the preheated oven for 20-25 minutes, or until a toothpick inserted in the center comes out clean.
- Cool the cake: Remove the cake from the oven and set the pan on a cooling rack. Allow the cake to cool completely to room temperature before handling it for crumbling.
- Prepare cake crumbs: Once cooled, crumble the cake using your hands or two forks until fine crumbs form.
- Mix crumbs with frosting: Add approximately 3 tablespoons of frosting to the crumbs. Mix thoroughly by hand or fork until the mixture is moist enough to hold its shape when rolled into balls.
- Form cake balls: Using a small ice cream scoop or spoon, portion the mixture and roll between your hands to create smooth, round balls. Place the balls on a plate.
- Chill cake balls: Cover the formed cake balls with plastic wrap and refrigerate them for at least 4 hours to firm up.
- Melt coating chocolate: Place the white melting chocolate in a deep bowl suitable for dipping and melt gently until smooth.
- Insert lollipop sticks: Dip one end of a lollipop stick into the melted chocolate, then insert it halfway into a cake ball. Let it set for 2 minutes to secure the stick in place.
- Coat cake balls: Dip the entire cake ball into the melted chocolate to coat it fully. Hold it sideways over the bowl, rotate gently, and tap off excess chocolate for a smooth finish.
- Dry cake pops: Stick the lollipop ends into a styrofoam block to dry and harden the chocolate coating completely.
- Decorate with fondant: Roll out fondant and use a 3 ½ inch circle cookie cutter to cut out circles. Place each fondant circle over the top of the dried cake pop and gently pull the sides down to cover the pop, creating a ghost-like appearance.
- Draw ghost face: Use an edible pen to draw eyes and a mouth on the fondant-covered cake pops to complete the ghost effect.
Notes
- Makes about 16 cake pops.
- Ensure cake is completely cooled before crumbling to avoid soggy balls.
- Use a high-quality white melting chocolate for best coating results.
- Keep cake pops refrigerated if not serving immediately to maintain shape and freshness.
- Customize ghosts by using different facial expressions with the edible pen for added fun.
- Prep Time: 20 minutes
- Cook Time: 25 minutes
- Category: Dessert
- Method: Baking
- Cuisine: American


Leave a Reply